“Do we all love Uplift desks?”1
This innocuous toot reminded me that I’ve been using my custom standing desk for over 6 months, and have yet to blog about it like I intended to. (In fairness to myself, I’d not written it on my to-do list, so boo past me.)
“But Nic, I’m not that handy.” “Oh man, I couldn’t do that, what if it didn’t work?” “I’ll just buy this one, it’s cheaper.” No. Stop. Just… just read this. Give it a chance.
I looked at all of the standing desks out there. Uplift. Herman Miller. Branch. IKEA. Amazon. I’d eventually settled on Uplift, and bracing for convincing my wife that spending $1k on a new desk was a worthwhile investment.
Then, when talking to some of the Relay FM Discord members, one person suggested just building my own. I’m pretty sure I had the same reaction I told you not to; “I’m not that handy.” “What if I fuck it up?” “I’ll just buy one.” Thankfully, they convinced me otherwise, and I managed to get away with spending considerably less on a desk than I would’ve otherwise.
There are only 3 steps that you MUST follow in order to build your own desk. Here’s what I did:
Buy The Stuff
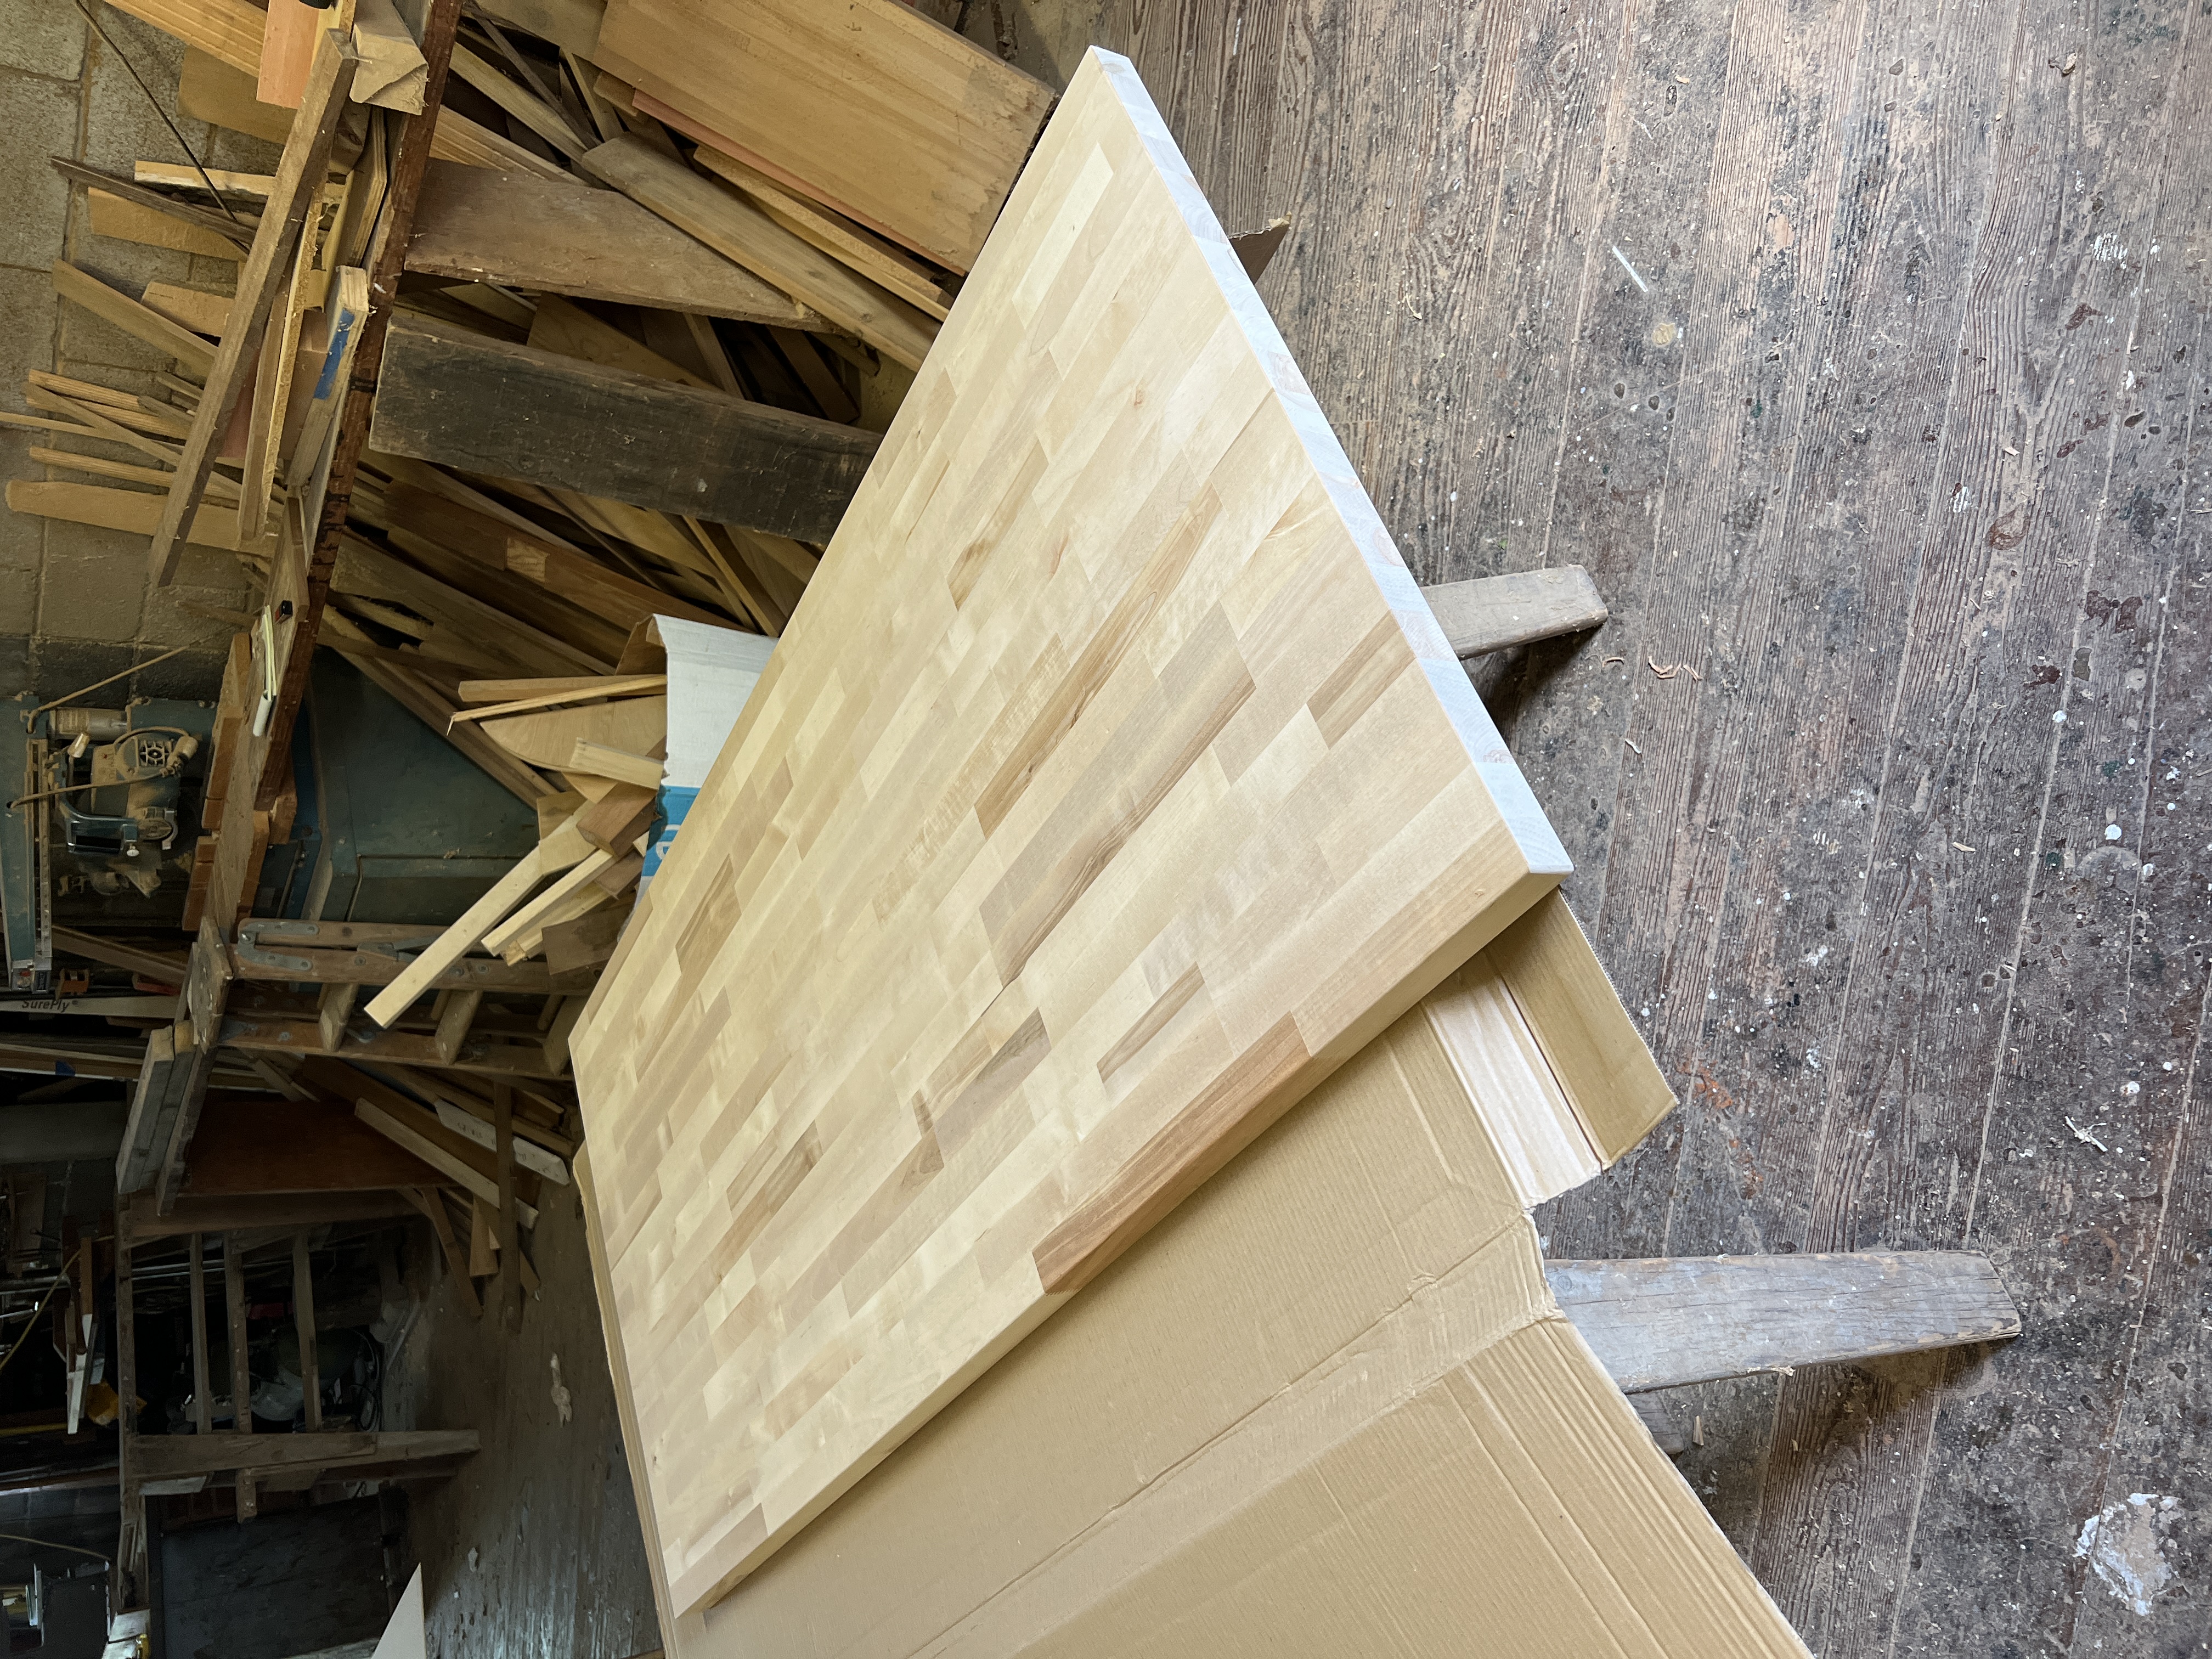
Kinda a “duh” step, but yeah. You will need two things: a butcher block countertop, and a standing desk frame. I went with a birch 5ft x 30in block from Home Depot, and the VIVO dual motor frame. You do not need these exact items, but I can vouch for them. The frame can support a desk just under 7ft wide, so you have some flexibility there.
This is literally all that you MUST buy. Total cost: $380. Which, by my math, is WAY less than the ~$1,000 a lot of Uplift configurations come in.
Protect It, and (Optional) Make It Prettier
The countertop looks great right out of the box, and if I’d just sealed it right then, I would’ve been perfectly happy. However, I had access to some tools and had some ideas, so I decided to make a few modifications.
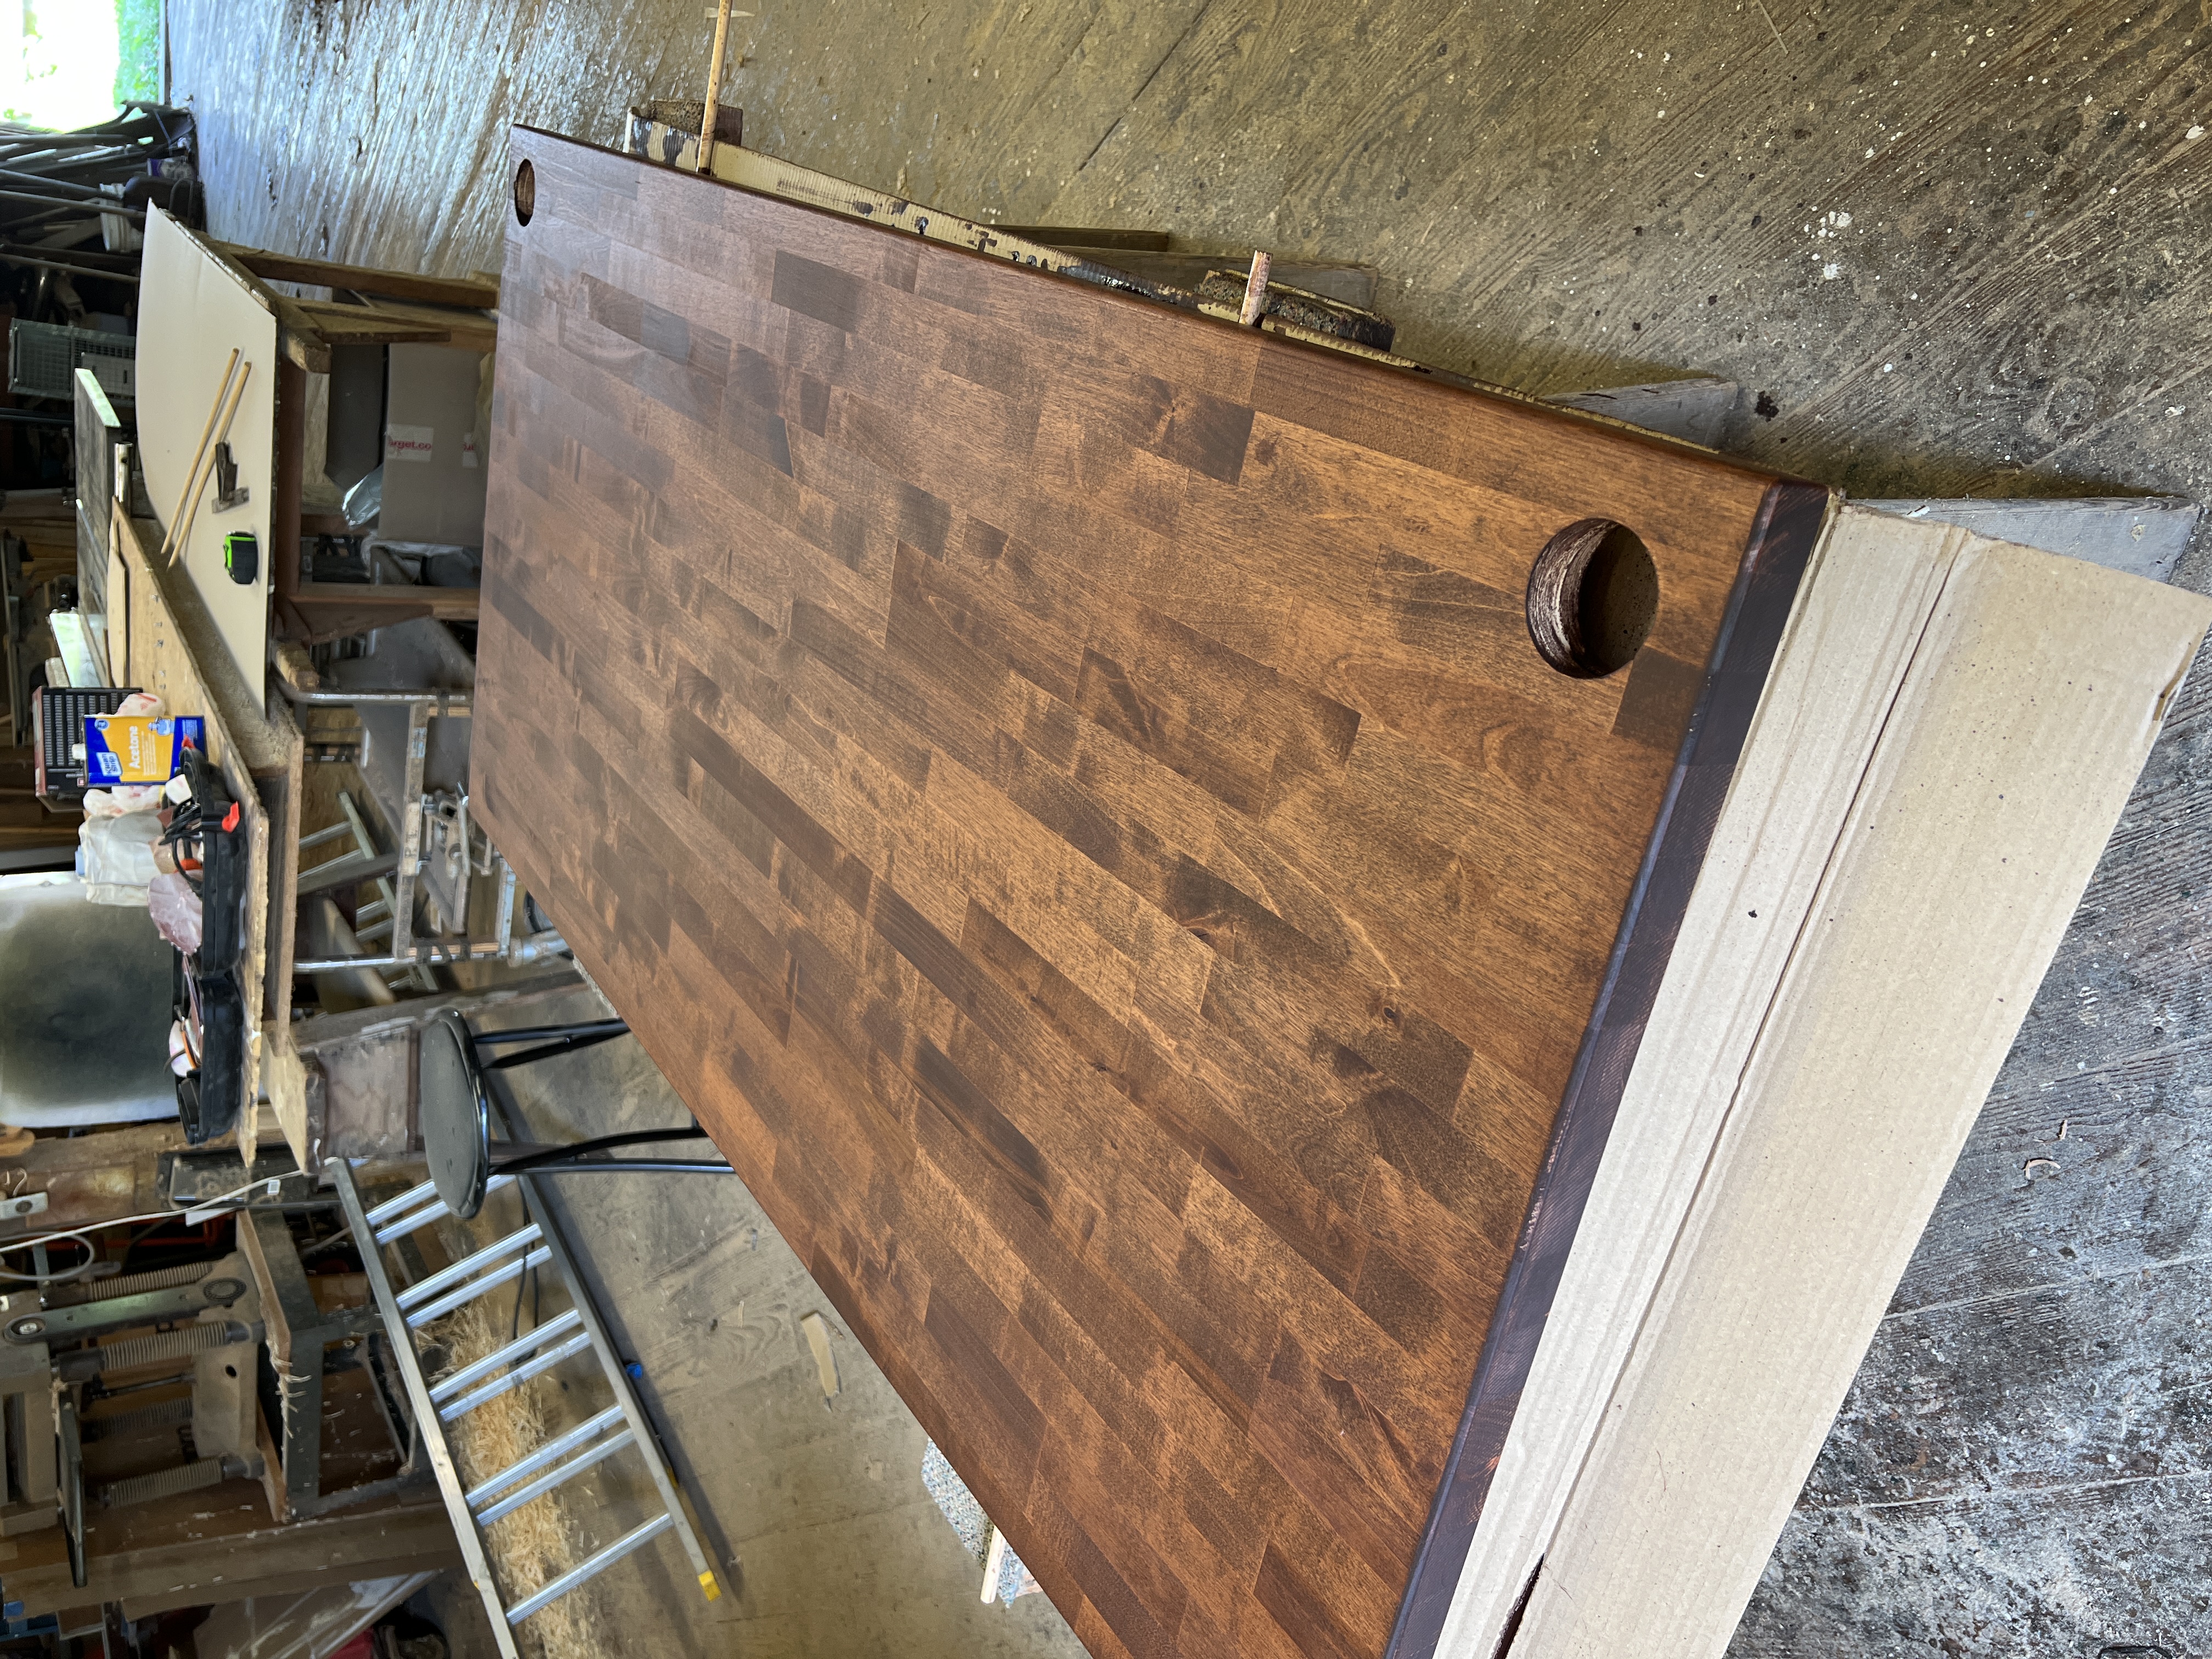
- (Optional) I decided that I wanted a couple of holes in the corners of my desk to route some speaker and power cables through. I used a hole saw and a power drill to accomplish this. I got some cheap grommet hole covers to route cables through; you could optionally get some that have power outlets built in to them (something I wish I’d done, and might go back and add eventually).
- You’ll need to sand the countertop down first; 80, 150, and 220 grit sandpaper passes did the trick just fine.
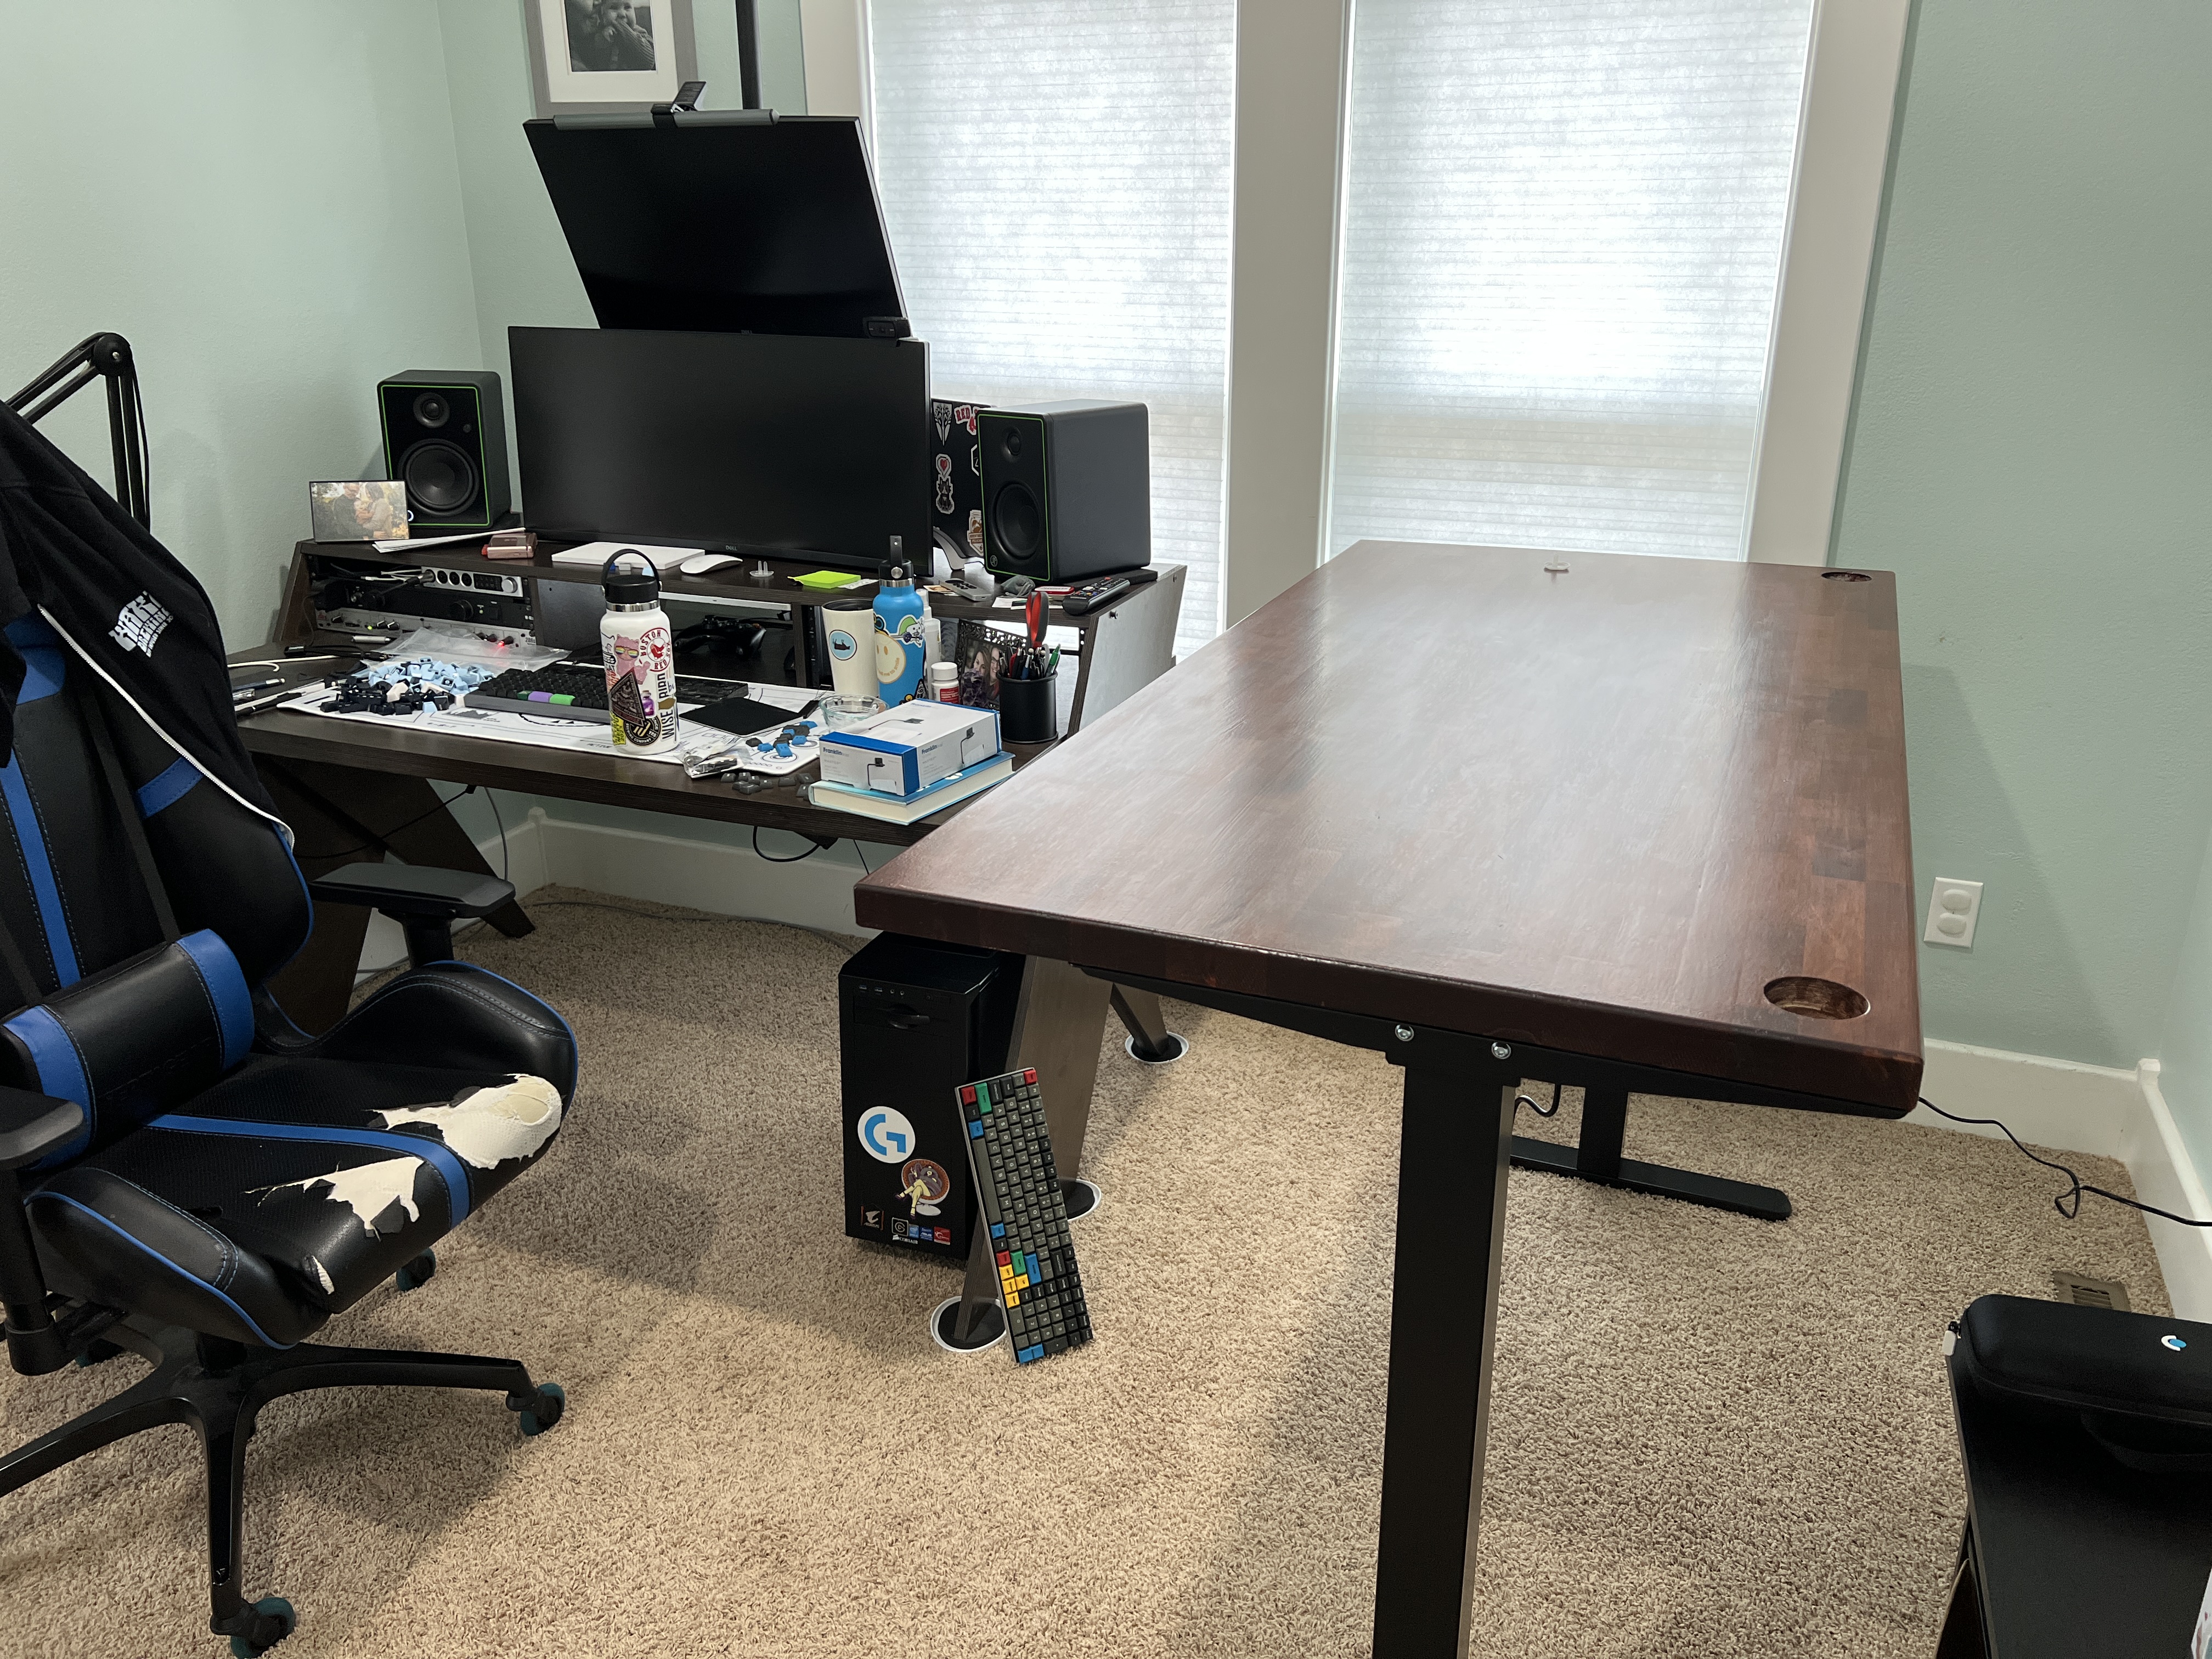
- (Optional) I went with some honey colored Varathane wood stain for that nice, rich brown look. 2 coats made it pop.
- I sealed my desk with [Varathane’s satin polyurethane]. 2 coats, plus some buffing with 0000 steel wool, took care of this.
At this point, I have a desk top that is fully protected, has the color I want, and a couple of grommet holes. Cool.
Avengers, Assemble
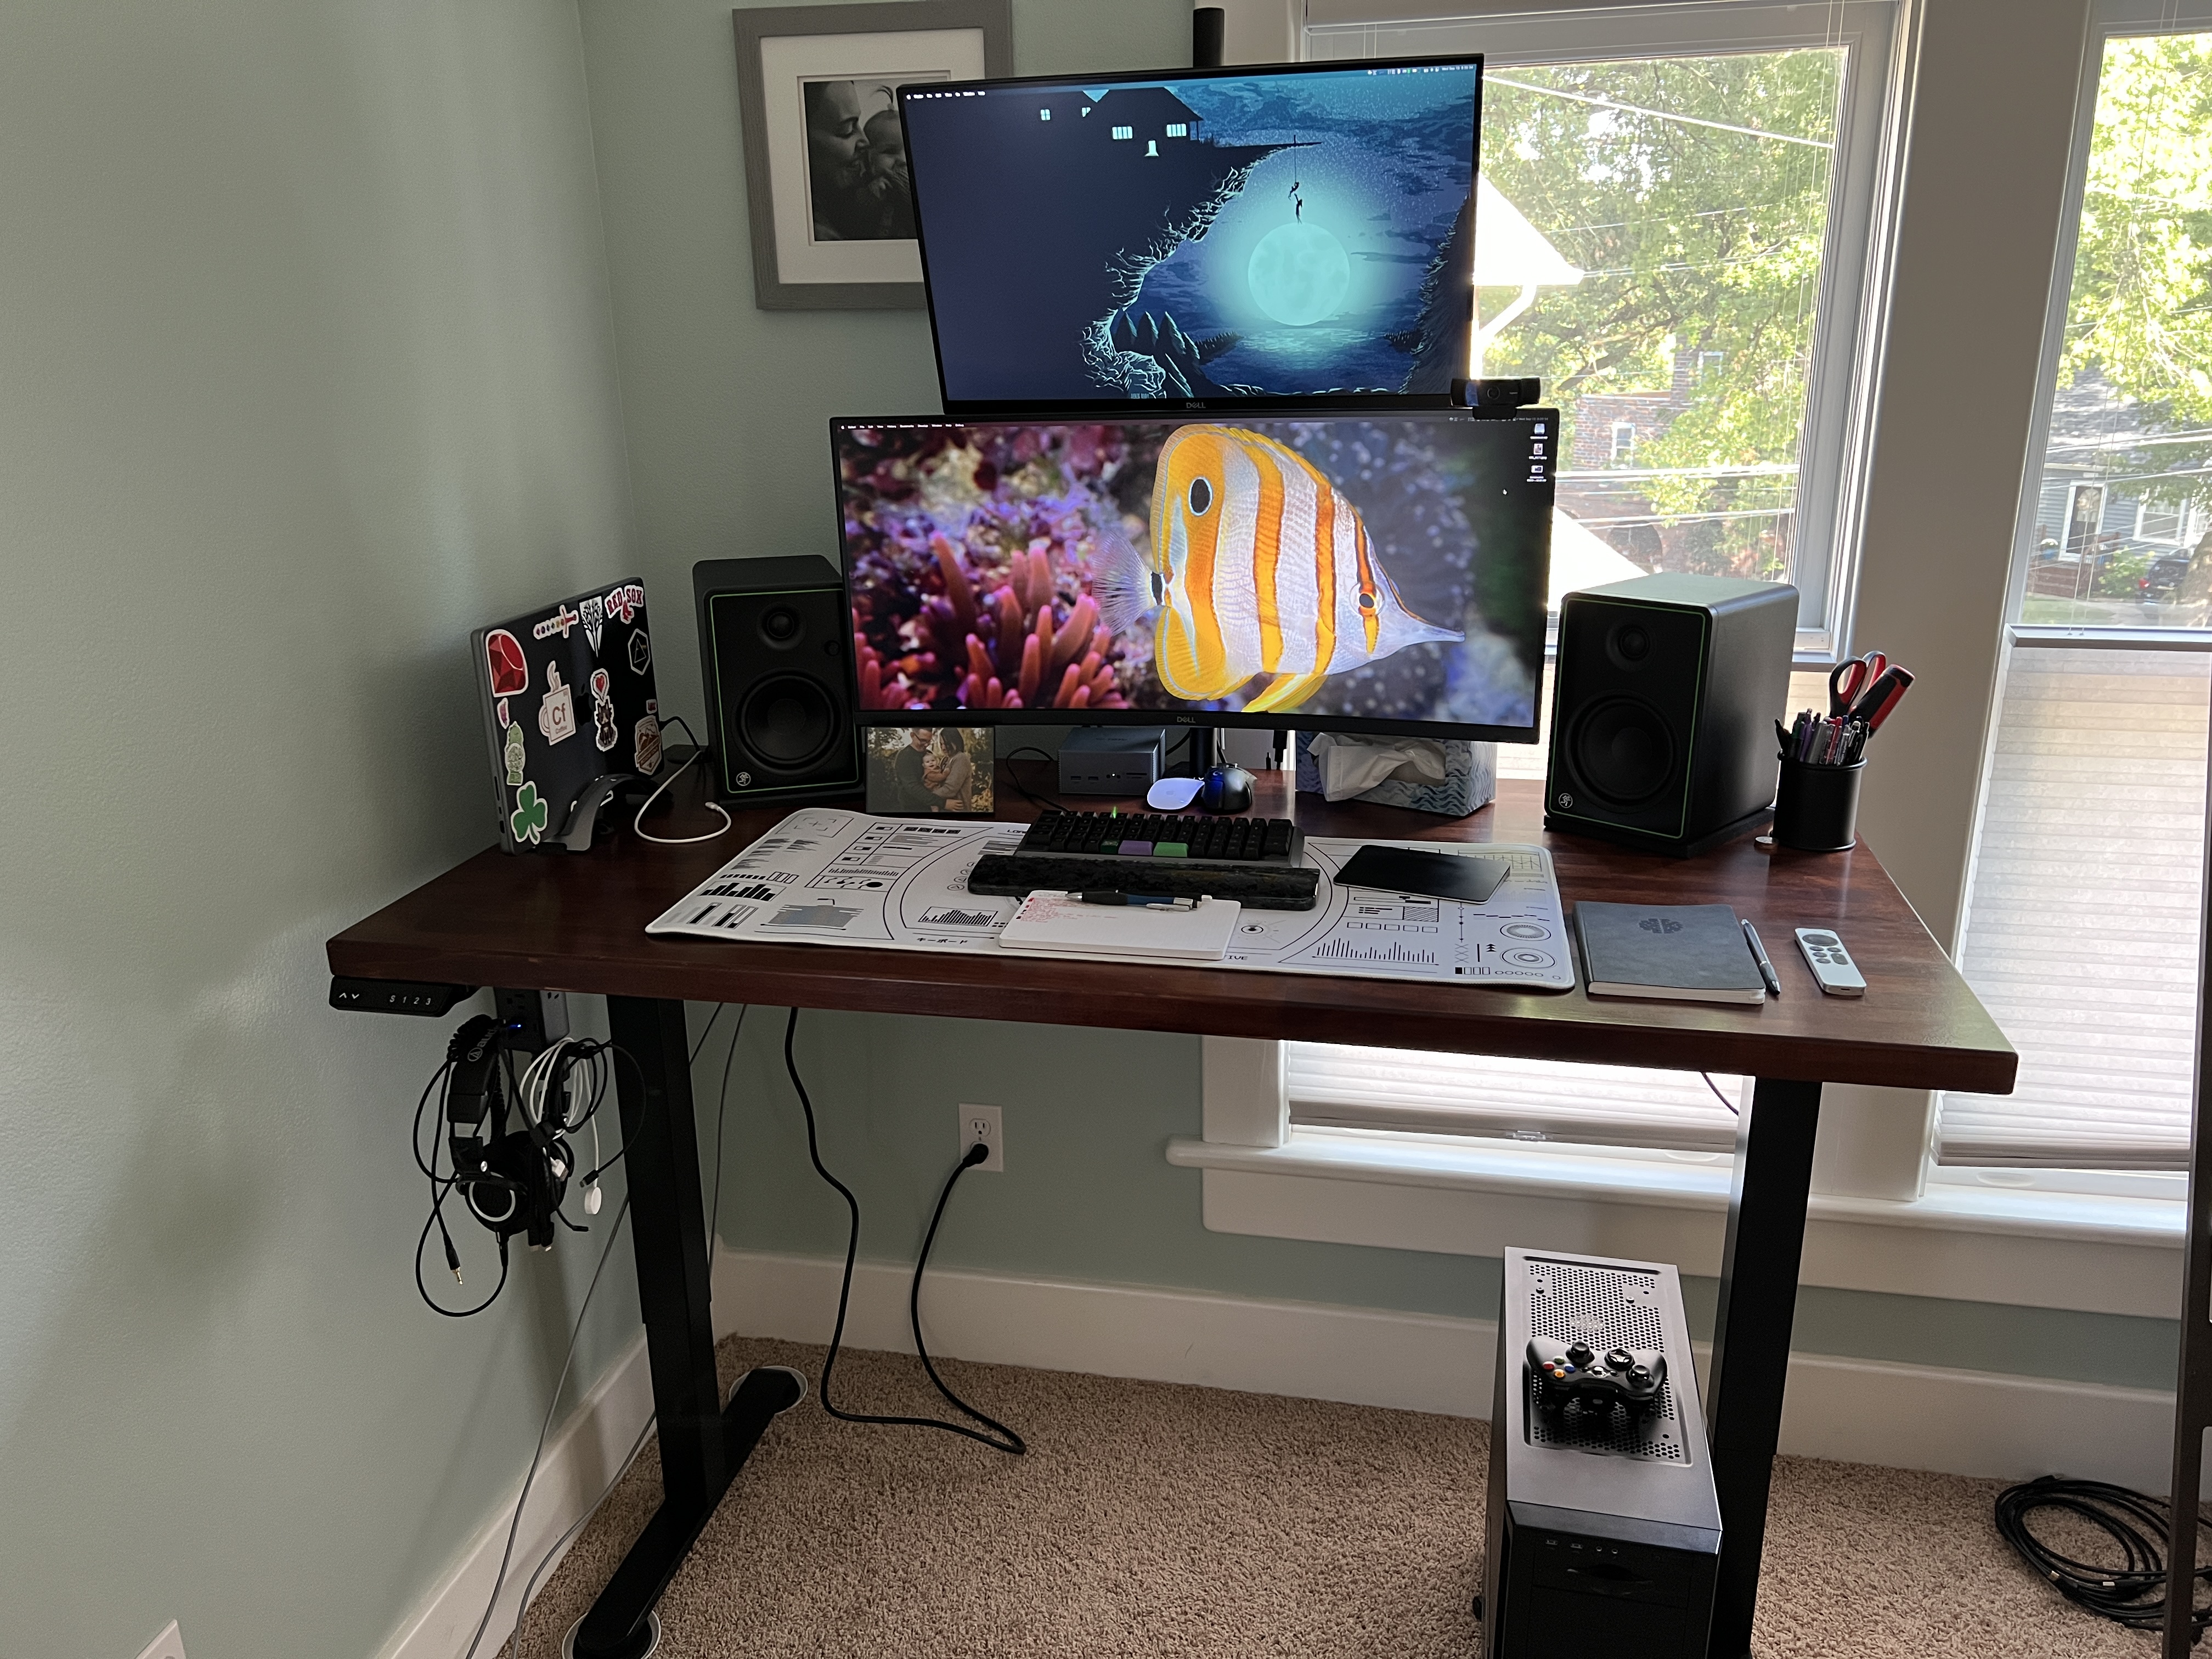
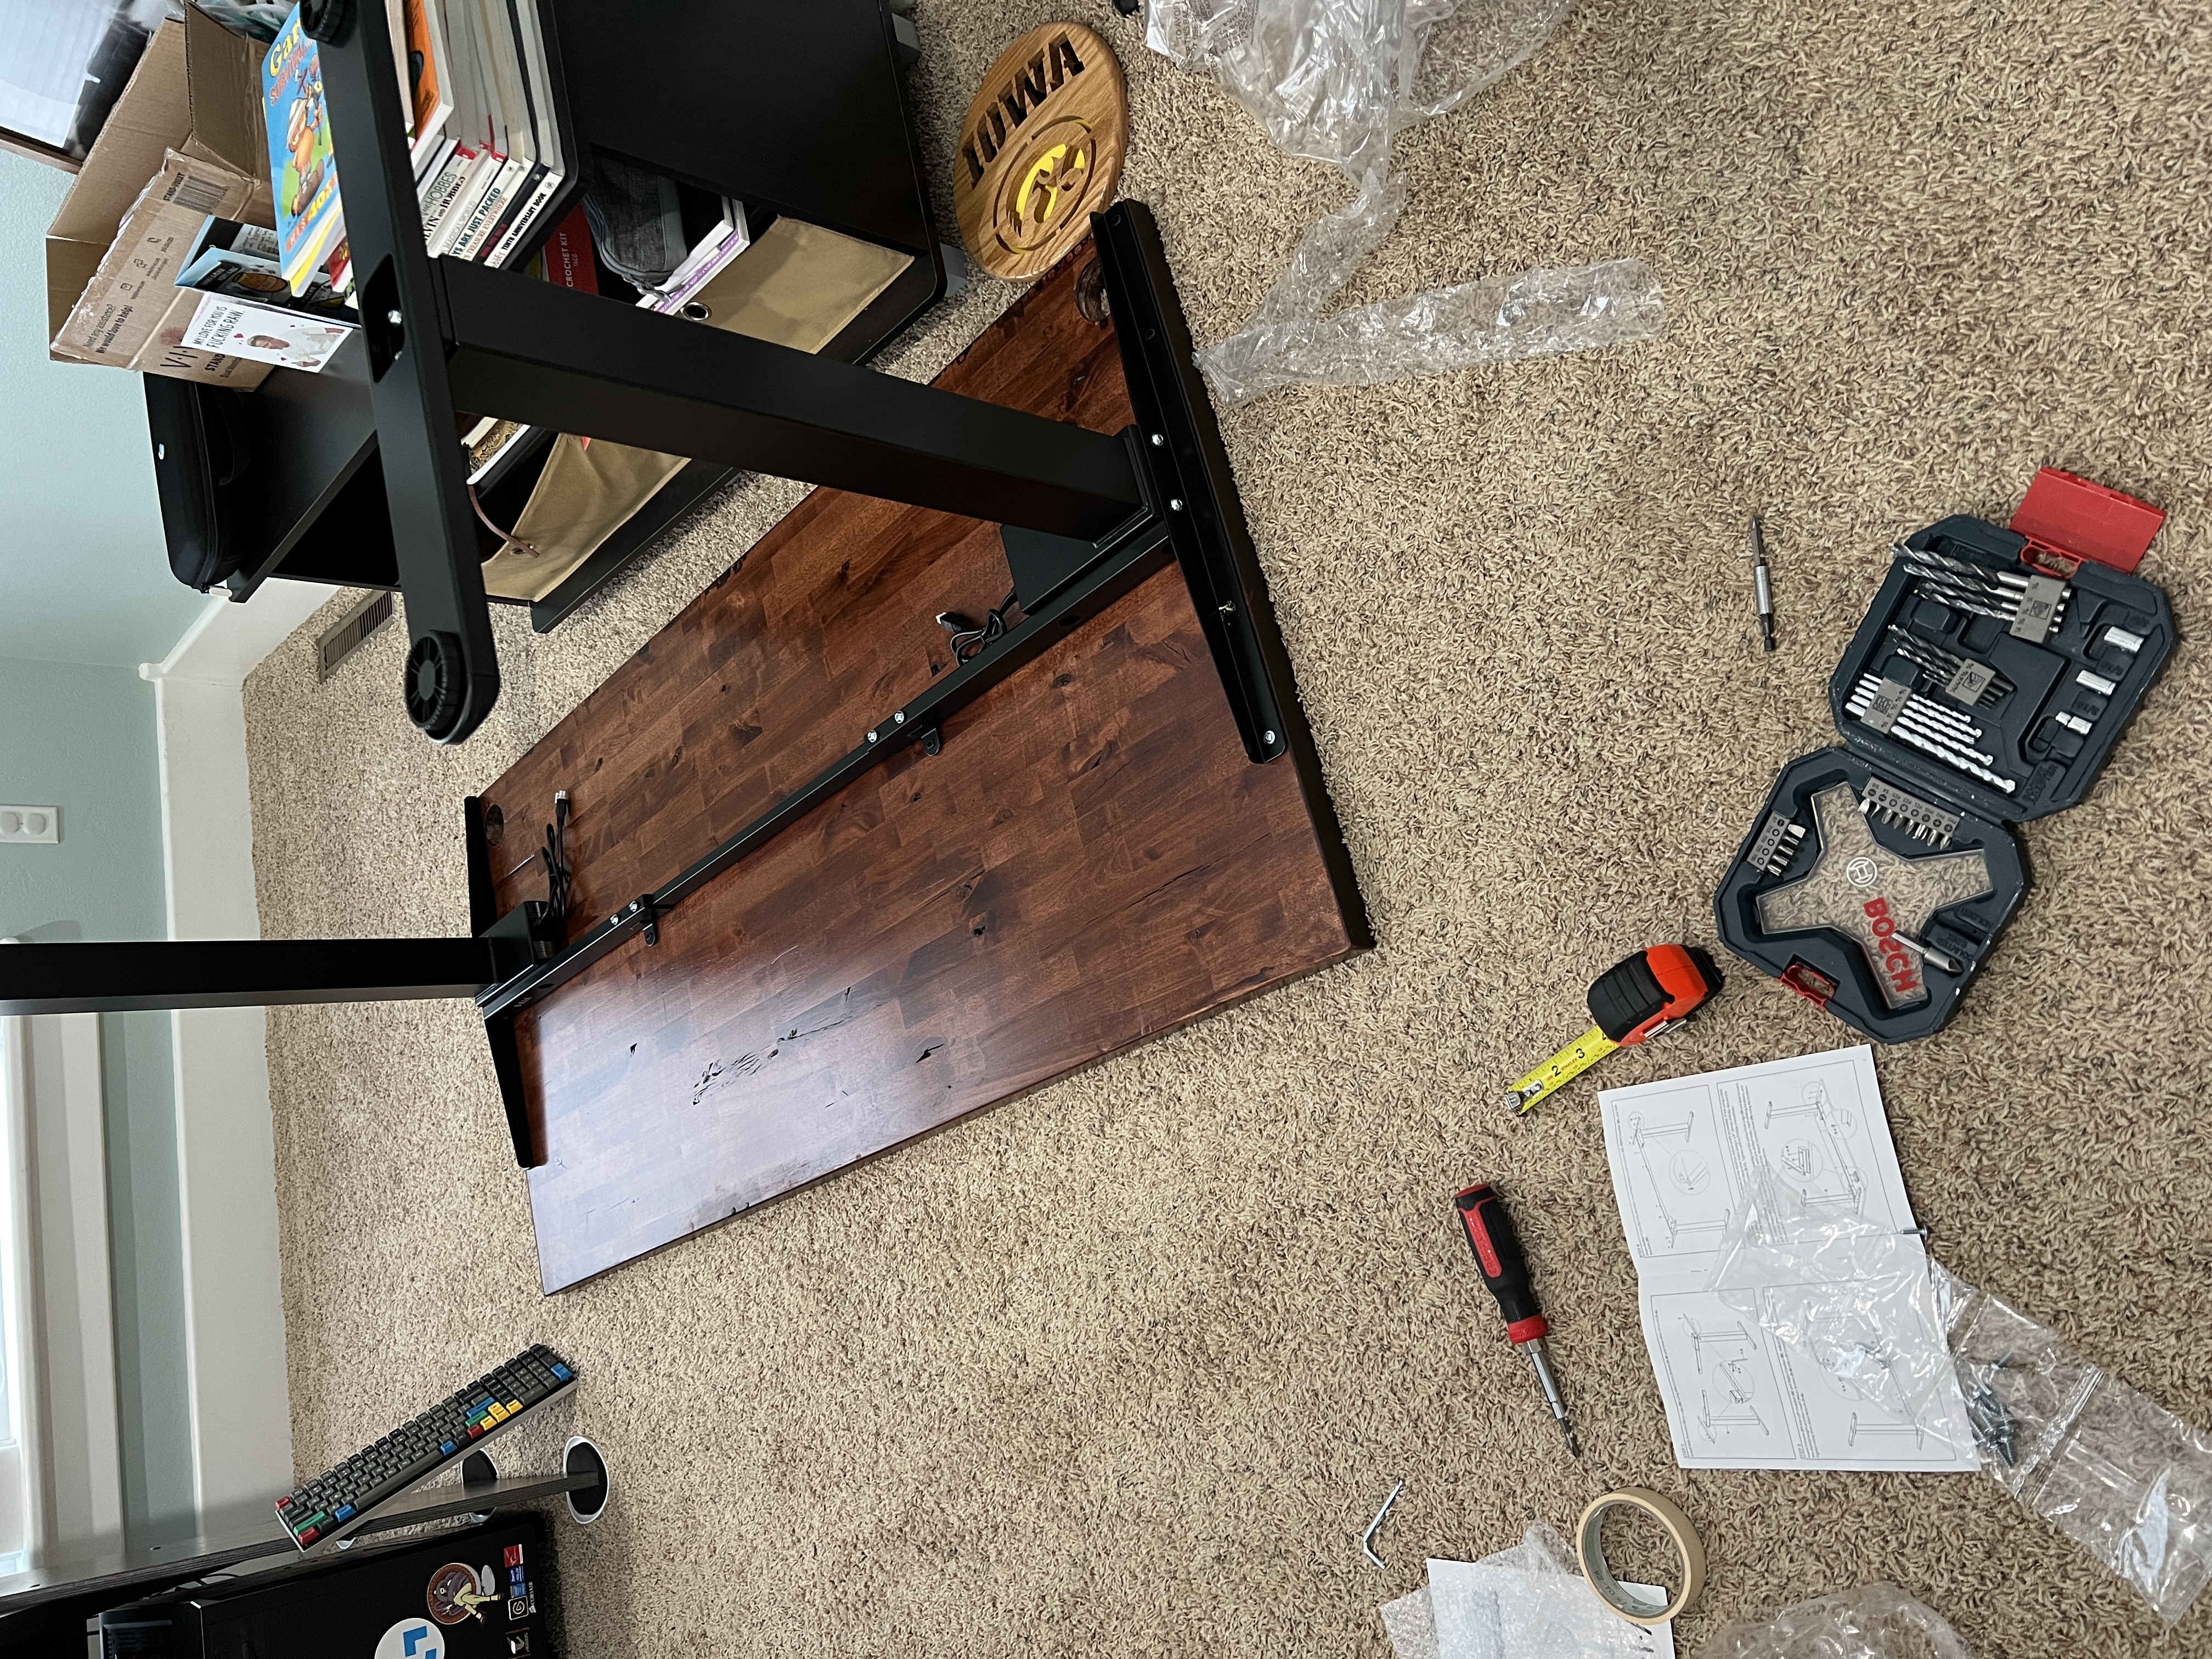
This part was also quite simple. The VIVO frame went together easily. I mounted it so the frame was flush with the back corners of the desk; most of the weight from the monitors, speakers, and computer will end up being over the back edge of your desk, whereas most of the weight on the front will come from you leaning on it, so having the balance point further back worked perfectly. (If you get a top that is deeper than 30 inches, do a bit of research to see recommendations on mounting points.)
The other major consideration will be, do you want the controller on the left or the right? I decided to have mine on the left, which is contrary to every other desk I’ve seen, because it’s tucked away in the corner a bit more and I don’t have to be worried about my daughter getting at it.
Honestly, I was amazed at how easily this went together. I kept thinking “ok, what am I forgetting” over and over until I got it upright… lo and behold, I hadn’t forgotten a thing.
Add Any (Optional) Accessories
I added 3 (well, 4) accessories to my desk to make it more in line with what I wanted.
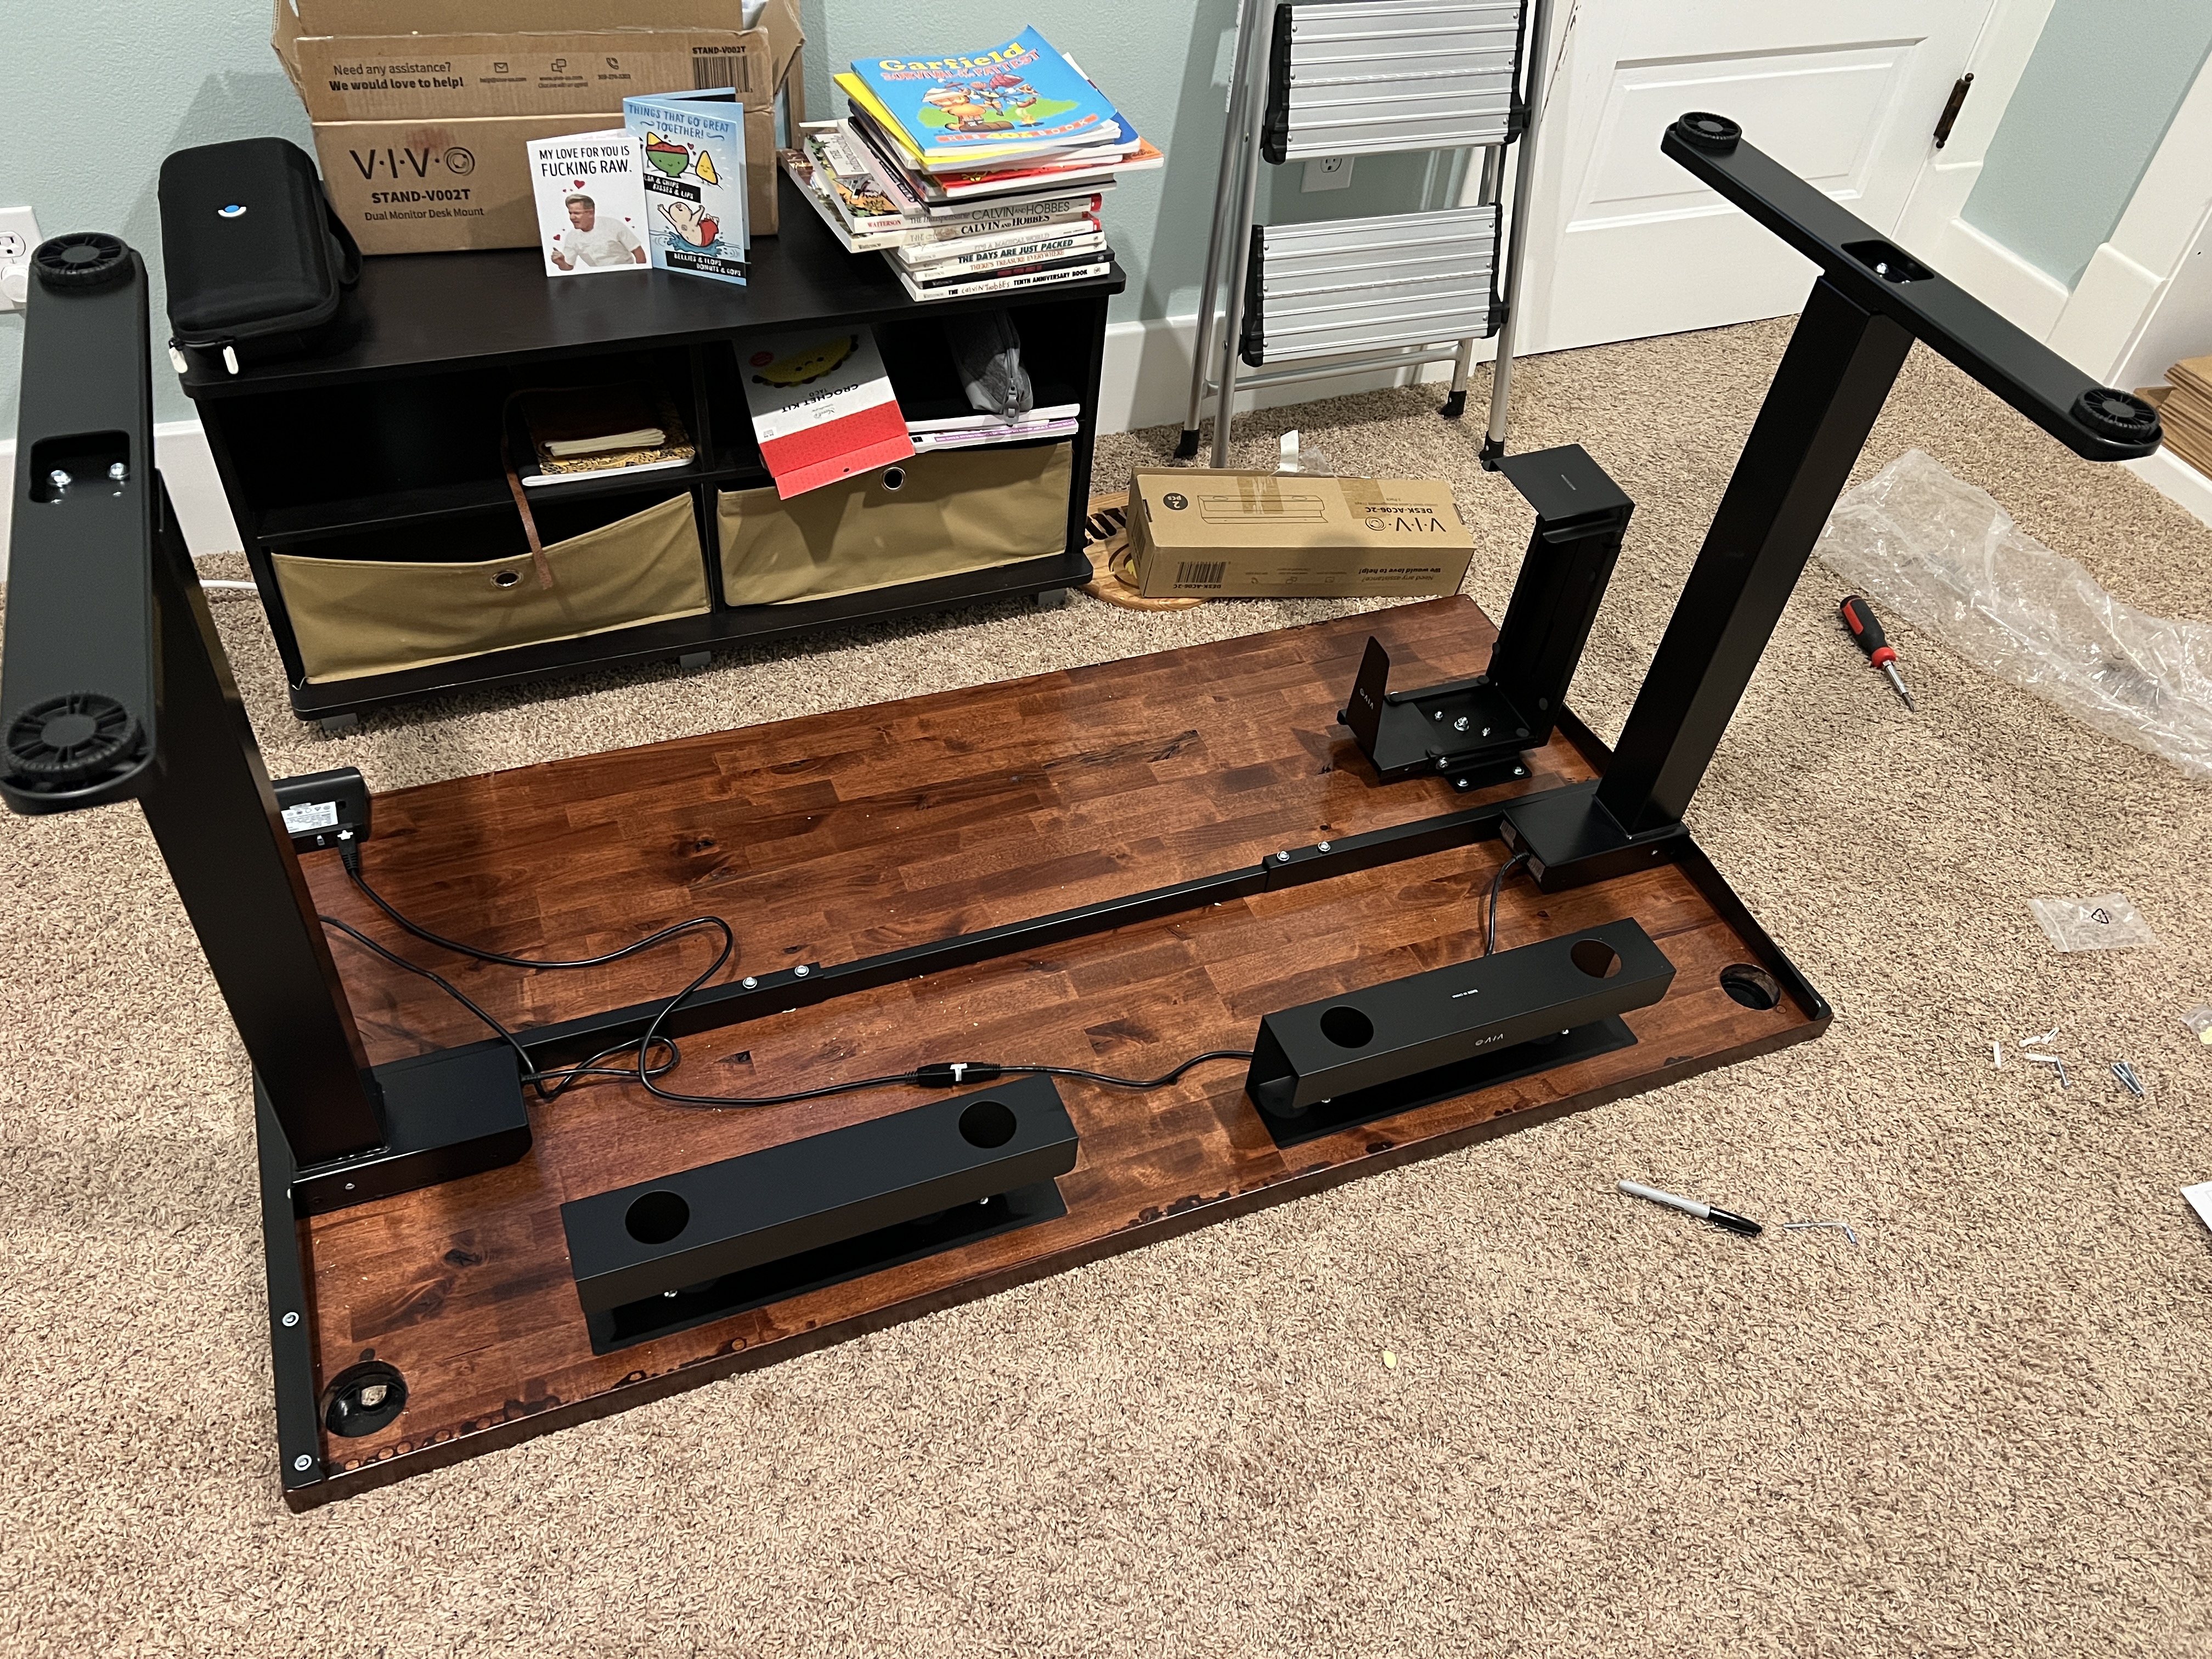
- An under-desk headphone mount + power outlet. Works perfectly to hold my gaming headset, and provide me with a couple USB ports & a power outlet for anything I need to plug in easily. (This was in lieu of me using a powered grommet hole like I mentioned earlier; I wanted to route cables and not have stuff on top of my desk.)
- Cable management trays. Get all my cables up off the floor.
- A good power strip with surge protection. I have one that I’ve used for years that looks something like this; lots of outlets, and a long cord leading off of it. Anything that lives on my desk (including the motors) plugs in to this, and I have a single power cable running off with enough slack to handle sitting or standing heights. I mounted this upside down under the desk with some screws.
- A computer tower holder. I had aspirations of having my tower go up and down with my desk, especially since I’m seated on plush carpet. However, I forgot to check the specs, and found out after I’d attached it to my desk that my tower was too wide. There wasn’t a solution I really liked, so I just got a stand for my tower and leave enough cable slack for when I stand up.
There’s tons of accessory options that you can add to your own desk; drawers, power, monitor stands, and more. You’ve saved a ton of money on the desk, so feel free to snag anything you need. (Pro tip - if you’re on carpet, and want to get your desk into a corner, get some furniture sliders under the legs, assemble and get everything powered in the middle of the room, and then slide it back in to place.)
That’s it! It might seem like a lot of work, but it’s honestly something that anyone could tackle in a weekend (waiting for the stain and/or sealant to dry & cure takes the longest amount of time). For less than half the money you could’ve spent on a commercially available option, you could have your very own desk that you build with your hands, something you could be proud of every time you used your desk.
If you give it a go, reach out and let me know! I’d love to see what you do.
-
Yeah, I’m back on Mastodon. It moves slowly enough that I feel ok being there. I haven’t put it on my phone yet, and probably won’t. ↩